There is a moment every spring in northern Illinois when the snow is gone, the grass is waking up, and you step outside and think to yourself, "Something looks messy, but I can't quite figure out what it is."
Nine times out of ten, that "something" is your edging.
You can have healthy turf, nice plants, and beautiful flowers, but if the line between your lawn, beds, and hard surfaces is fuzzy, the whole yard feels unfinished. Clean edges, on the other hand, make even a simple landscape look sharp, intentional, and well cared for.
Why edging matters more than you think
The frame does not change the painting, but it changes how you look at it. Edging works the same way; it's the border around your landscape.
Edging is not just about neatness. Good edging does three important things:
- Frames the house and landscape to enhance curb appeal
- Makes mowing and trimming easier and faster
- Signals that the property is maintained

Think about a picture frame. The frame does not change the painting, but it changes how you look at it. Edging works the same way; it's the border around your landscape.
Step 1: Plan the lines before you cut
It is tempting to grab a shovel and start digging, but a little planning will save time and will leave you with better results. Walk around your yard and ask yourself a few questions.
- Where do you want the lawn to stop and the beds to begin?
- Are there awkward curves that make mowing difficult?
- Are there straight lines that feel harsh against the house style?
- What do you see from the street and from your front windows?
Use a hose, rope, or even marking paint to sketch new lines on top of the existing lawn. Stand back and observe your landscape from different angles. You'll want to smooth out sharp kinks and avoid creating zig zags that will be hard to maintain.
Remember, continuous curves around corners and along walkways are easier to mow than tight wedges, which require extra trimming.
Step 2: Choose your edging style
You do not have to pick the fanciest material to get a great result. There are four main types most homeowners consider:
Natural cut edge
This is a clean trench between lawn and bed created with an edging tool or spade.
- It costs less and is flexible
- It's easy to change if you adjust the bed shape later
- It only needs to be touched up a few times per season
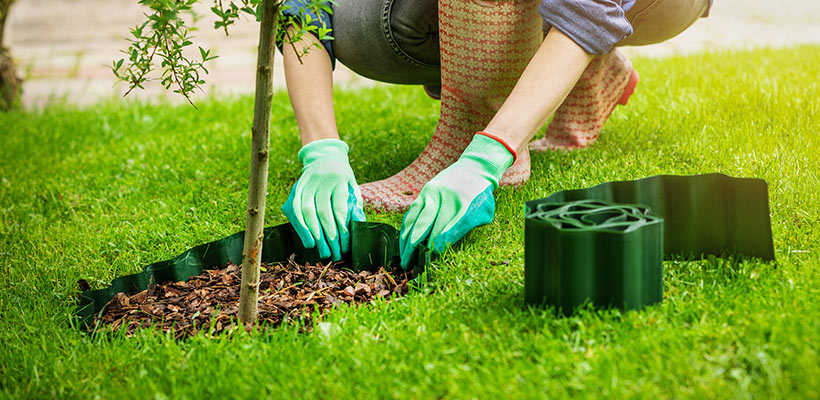
Plastic or rubber edging
This comes in rolls and is pressed into a narrow trench, offering nice curves.
- It helps keep mulch in place
- It can be visible if not installed properly
- It can heave with the change in temperature
Metal edging
Thin steel or aluminum strips create a clean modern line.
- They are very durable and neat
- They're good for straight lines and large gentle curves
- They cost more and are best installed by a professional
Stone or paver edging
Bricks, blocks, or stones form a solid border.
- These add visual weight and definition
- They can double as a small mowing strip if set correctly
- They require solid base prep so pieces do not shift and tilt
For many northern Illinois homeowners, a natural cut edge around beds and trees plus a more defined edge along drives and walks is a good balance between cost and reward.
Step 3: How to edge a bed the right way
Here is a simple method for creating or refreshing a natural edge around a bed.
- Mark the line
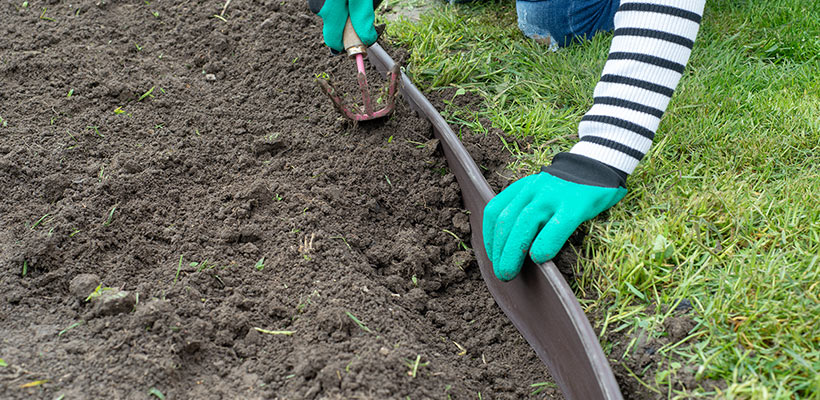
Use a hose or paint to define the shape; smooth out any wobbles. - Cut the edge
Use an edging tool or flat spade to cut straight down along the line, usually about 3 to 4 inches deep. Push the tool in, rock it slightly toward the bed, then lift out a small wedge of soil and grass. - Shape the trench
You want a slight slope from the lawn down to the bed, not a vertical wall. This helps mulch sit lower than the turf and keeps it from spilling onto the grass. - Clean and mulch
Remove loose chunks, then pull mulch back from the edge so the line is clearly visible. A defined shadow line where turf meets bed is what makes everything look crisp.
Once you get into a rhythm, this goes faster than you think and the visual payoff is immediate.
Step 4: Do not forget trees, corners, and side yards
Edging is not just for the front foundation. Some of the biggest curb appeal gains happen in overlooked spots.
- Tree rings
A clean edge around trees protects trunks from mower and trimmer damage and gives you a tidy place for mulch. Keep mulch a few inches away from the bark and avoid volcano piles. - Corners and fence lines
A bed that wraps a corner softens the transition and makes the property look more intentional. An edged bed along a fence can reduce the headache of trimming right against posts. - Side yards
These are often narrow and forgotten. A simple edge along the house and one clean bed instead of random patches of plants can make the entire property appear more complete.
Step 5: Edging along sidewalks and driveways
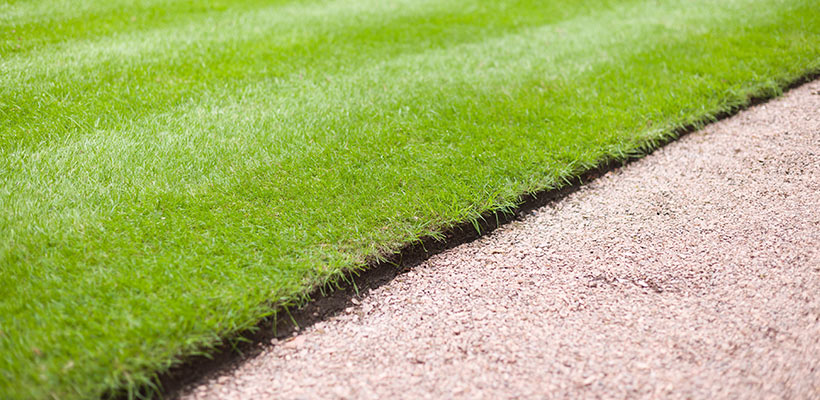
Nothing makes a front walk or driveway look sharper than a clean line where concrete meets turf.
The good news is that once you set your lines in spring, it only takes minimum maintenance to keep them sharp.

Over time, grass tends to creep over the edge and soil settles, so pavements start to look smaller and messier. Here's what you can do in the early spring:
- Use a manual or powered lawn edger to cut a vertical edge
- Remove soil and grass that have grown over the pavement
- Sweep debris away so the full width of concrete shows
These simple steps instantly boost curb appeal. They also protect your mower blade from hitting hidden edges. For long-term maintenance, consider adding a thin strip of stone or pavers along the edge. This will create a durable mowing strip and a strong visual line.
Step 6: Curb appeal tricks with edging
Once your edges are clean, you can use them to shape how people see your home. A few simple ideas:
- Frame the front entry with a bed that draws attention to the door
- Use a generous curve at the driveway corner that appears welcoming
- Tie separate plantings together with one continuous edge; avoid multiple small islands
Think about the first thing someone sees when that person looks at your landscape. Edges should create smooth transitions as opposed to interruptions.
Step 7: Keep it looking good all season
Edging is not a once-and-done task. The good news is that once you set your lines in spring, it only takes minimum maintenance to keep them sharp.
- Refresh natural edges a few times a season with a quick pass of the edger or spade
- Touch up mulch that has spilled over
- Keep grass height consistent so the edge shadow line stays even
If you install plastic, metal, or stone, be sure to inspect the installation after a heavy rainfall and during freezing and thawing temperatures. You may need to reset portions of the installation that have shifted.
Common edging mistakes to avoid
A few simple missteps can undo good work. Be sure to watch out for the following:
- Edges that wander and wiggle where they should be smooth
- Beds that are too narrow to hold plants comfortably
- Mulch piled higher than the lawn, which looks messy and spills over
- Tree rings cut too tight to the trunk or filled with mulch against the bark
If something seems off when you look at it, it probably is. Do not be afraid to adjust a line by a few inches. Small changes can make a big difference.
When to call in the professionals
You can do a lot of edging work on your own with simple tools. There are times, however, when calling a professional makes sense:
- Large properties where the scope is overwhelming
- Complex hardscape edging with stones or pavers
- Yards that need a new overall bed layout, not just a cleanup
The LawnCare by Walter team can help you rethink shapes, set clean lines, and build a plan that fits how you actually use your yard. Once those edges are in place, ongoing care becomes easier and your curb appeal stays strong from spring through fall.
When you edge it like you mean it, everything else in the yard looks better. This spring, try looking at your property through a simple lens. The grass, plants, and house you already have may be only one clean line away from looking like a whole new landscape.